STM32 is an awesome alternative to Arduino board. Unlike 328P, it has native (fast) USB support. It is cheaper than 32U4. And it faster, 32 bit and has 10x more RAM!
Also, unlike Atmel, counterfeits wannabes are clearly identifiable (look at the microcontroller on your board. If it is CH32 – throw it into a trash can. STM32 and CKS32 are good)
It is easy to make it work – just follow the instructions:
(you can also use ST-Link V2 and connect to the board via 4 wires. I have found this approach very reliable. You can both flash firmware and upload sketches from Arduino IDE. I set both boot header switches to “1” when I do it. But programming via USB is more convenient, right?)
Ok, so you follow the instructions from Windows 10 PC and try to program your board via the USB and it cannot find the DFU.
Don’t worry, I have instructions that I have tested on 3 different Win10 computers and they work!
First download Zadig
(This tool is not just for STM32! I also used it for enabling access to USB SDR)
Unplug USB cable from the STM32 board
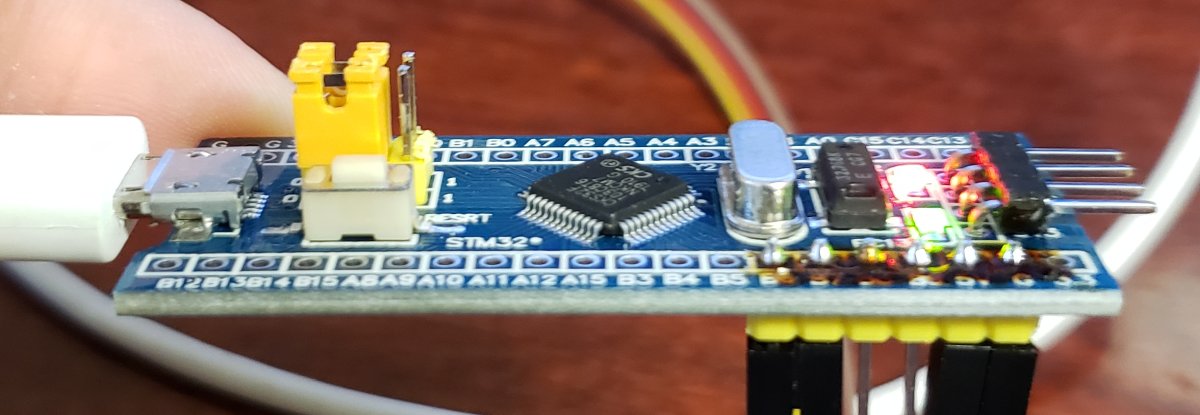
Set boot header switch to position on this picture:
(same for STM32 and CSK32 boards)
Start Zadig. Select Options – List All Devices
Select “Maple 003”
Important: if you see “Maple” instead of Maple 003 – your boot headers are in a wrong position.
Important: please do not update usb drivers for other hardware by accident! You might have your webcam or other devices to stop working! Please make sure you did selected “Maple 003”
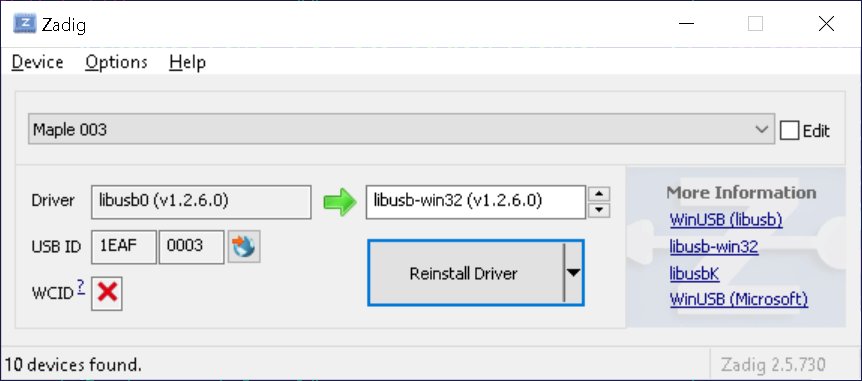
You will likely see an empty box on the left for the current driver version. My screenshot was made after the driver installation.
On the right, select libusb-win32
Wait what? 32 bit drivers on 64 bit Windows?
Well, I don’t know. It just works.
Push “Install Driver” button.
Wait half a minute for it to finish.
Close Zadig app.
Unplug USB.
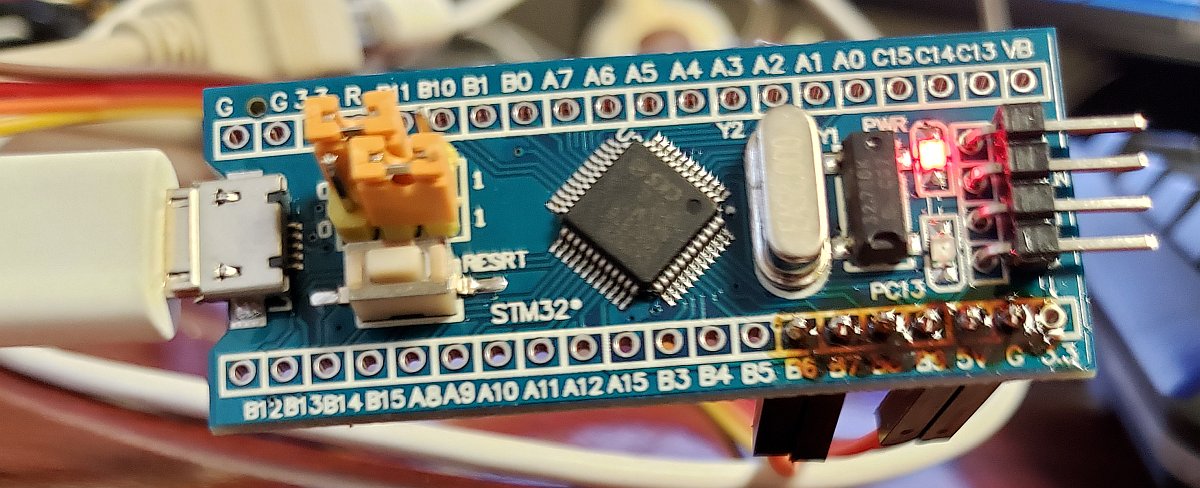
Set board boot headers into the following position:
Start Arduino and program it. If you see “Found it”, you are good, your board is being programmed!
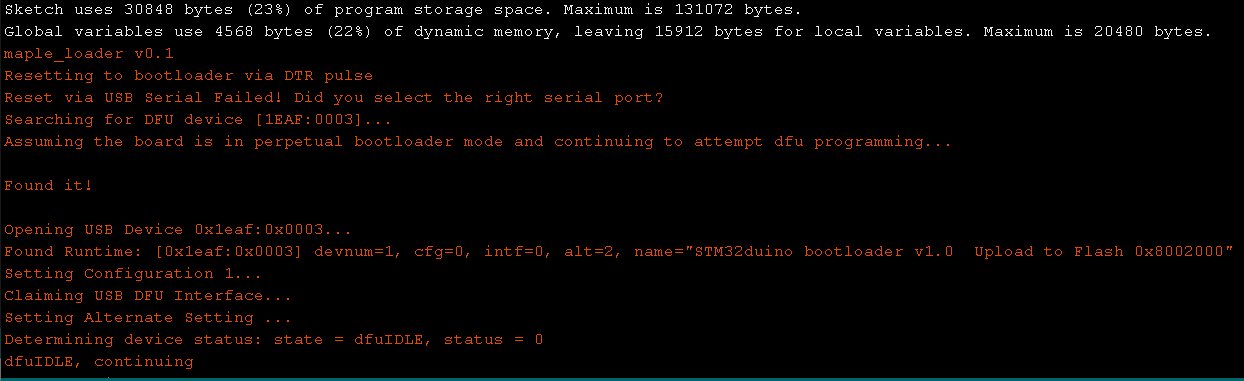
Congratulations! (if it still does not work – install driver “USB Serial” for this boot headers config – see below)
Here is my naïve explanation of the phenomena we have just observed: (I could be wrong)
Let’s load Zadig again.
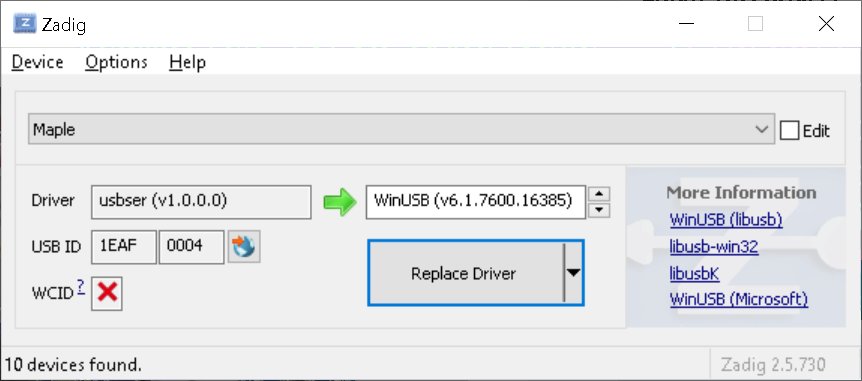
As you can see, the board name is now “Maple”, not “Maple 003”. Also, USB ID is 0004, not 0003
The driver is USB Serial (BTW, if you do not see a driver being installed in this mode – install USB Servial from Zadig)
So, we have two board USB modes: “0003” and “0004”, defined by boot header switch.
If it is in “0003” mode, it stays in “0003” mode forever.
If it is in “0004” mode, Arduino/DFU can switch it into 0003 mode for programming
You need USB drivers to be installed for both modes.
If you do not install a driver for mode 0003, Arduino/DFU switches the board into programming mode and can no longer see the board and programming fails of course.
Also, I suspect, that when board starts, it starts in 0003 mode, and after a some fraction of a second switches to mode 0004.
So, if after board reset you briefly see COM port appearing in Arduino and then disappearing again – it is the opposite USB driver problem – for mode 0004, not 0003 (I have seen it while messing around with different drivers)
Leave a Reply