Last time I promised to tell where did I get those 65 microscopic images with focus sweep.
Well, here is the microscope and Z stage:
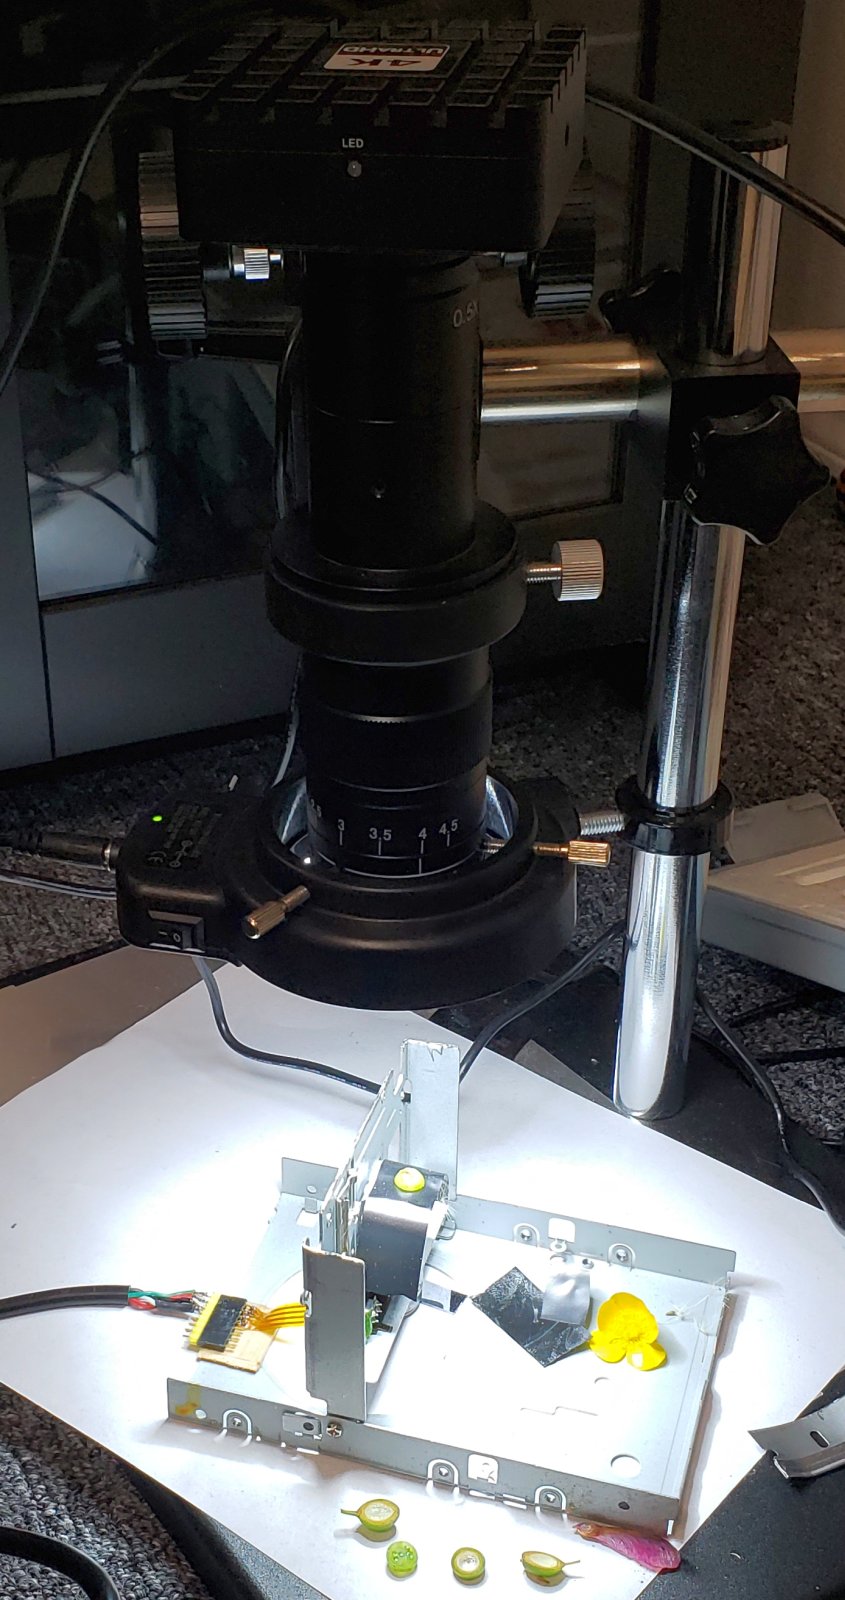
The stepper motor and linear actuator is from a 3.5 inch floppy drive
I use my favorite stepper amplifier from Aliexpress to drive it. I expected that the motor is 12V, so it would be kind of justifiable. But the motor is indeed 5V rated. It is ok, the amplifier is dirt cheap.
I use my favorite Arduino 32U4. It rocks as usual!
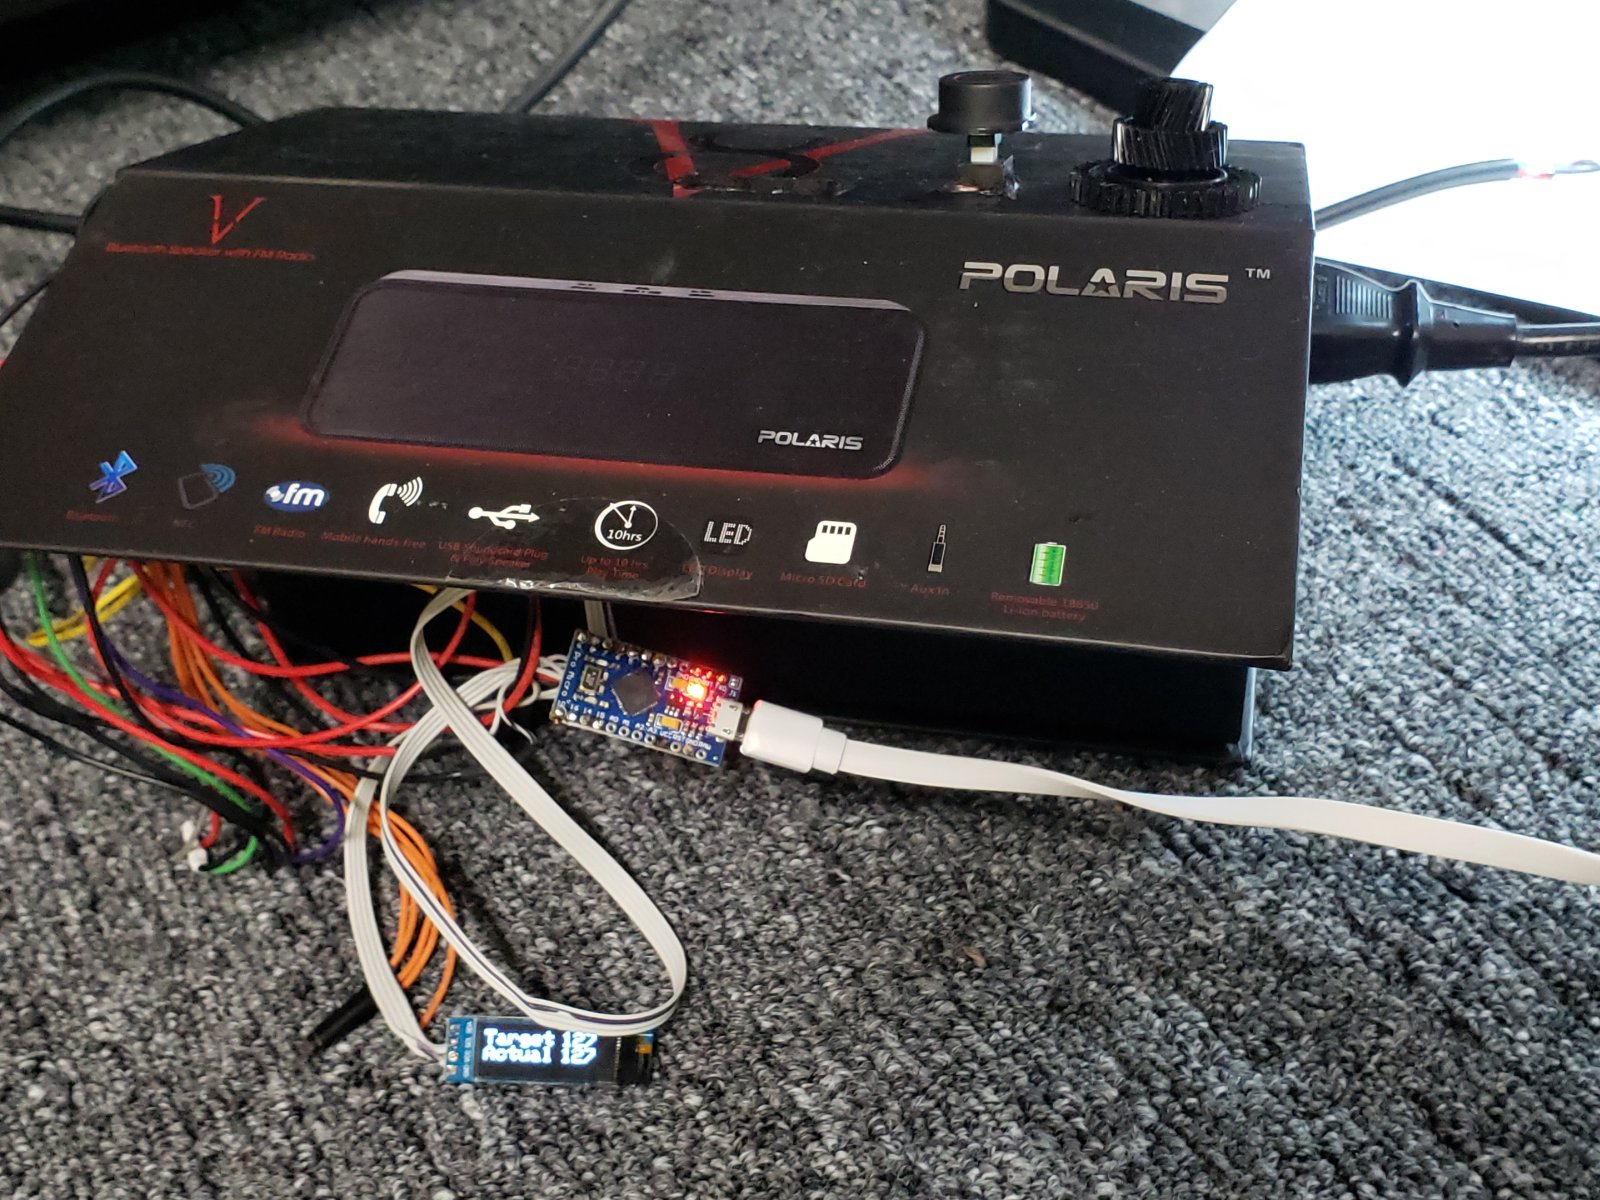
I built it all in this box:
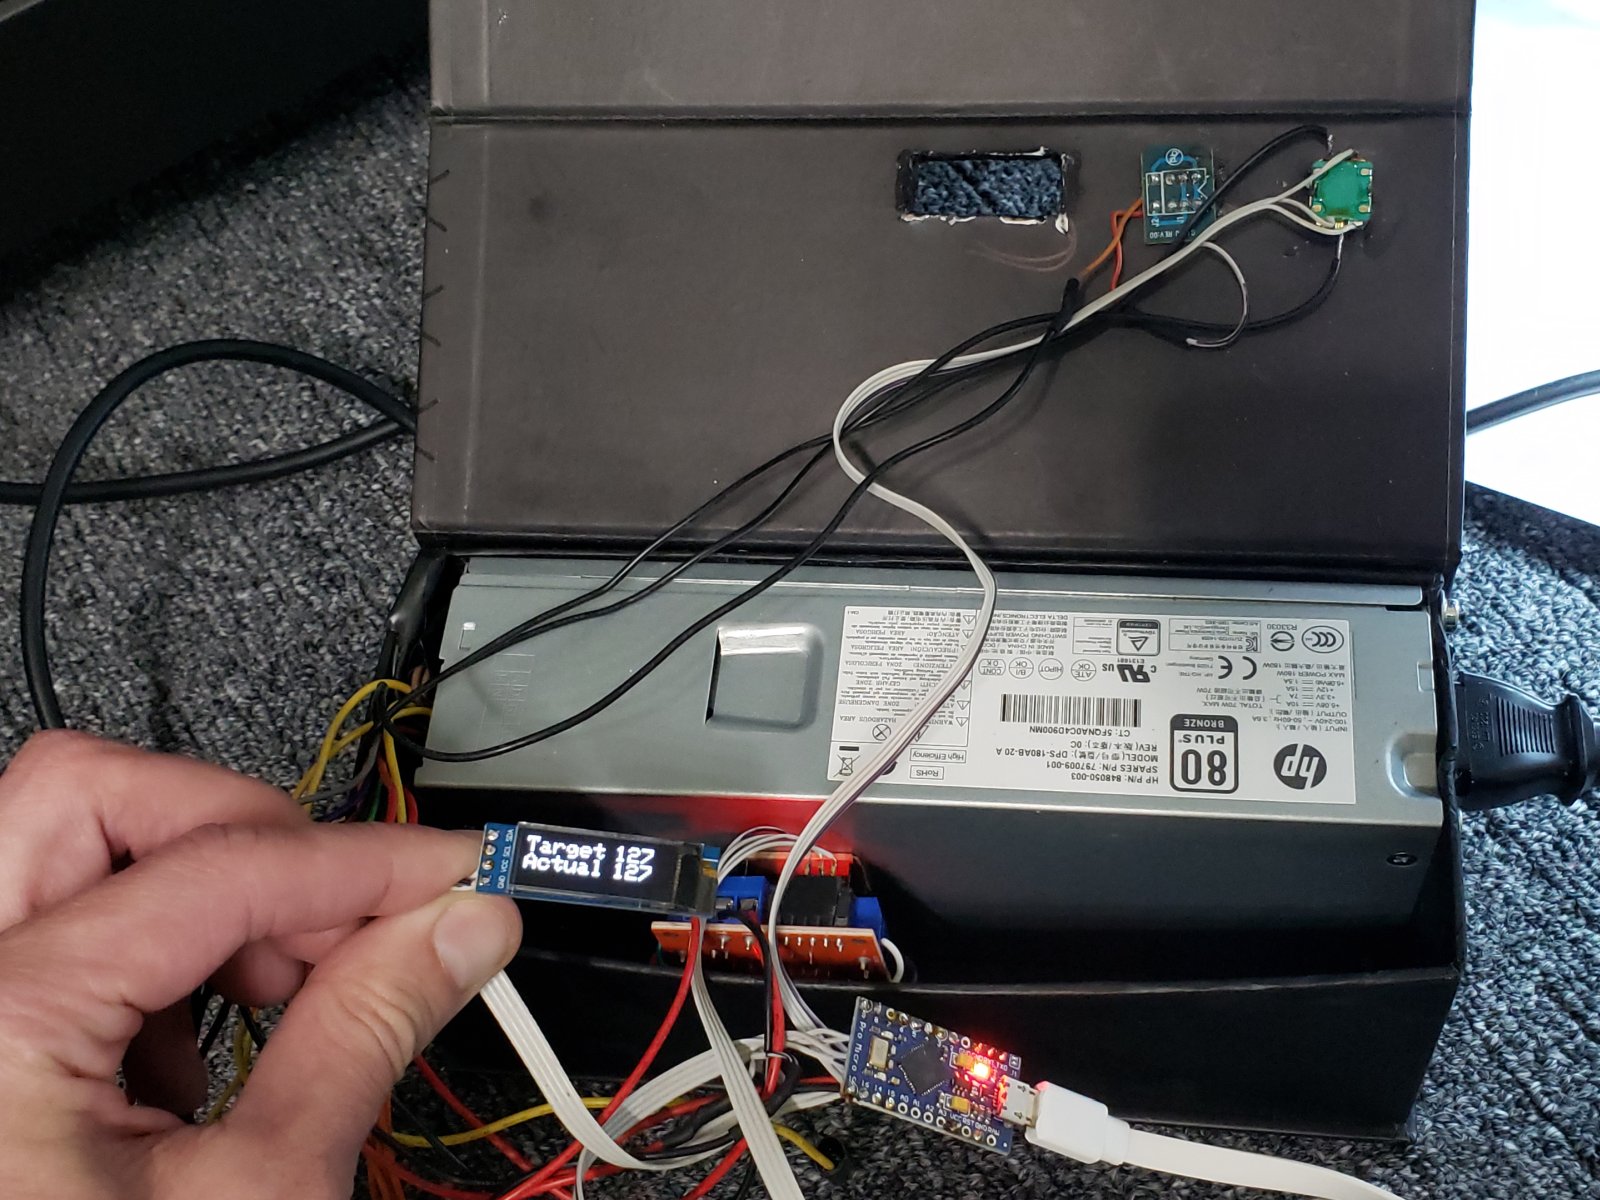
This is how it looks like inside:
Cool, huh?
Well, here are many “lessons learned”.
- Do NOT make enclosure out of carboard. I had that extremely sturdy and nice looking box – exactly the right size! Guess what? It is only sturdy until you start cutting holes and attaching components to it.
- Check motor voltage rating before starting the project! I did not need this 12V power supply! Indeed, it all can work from USB 5V connected to Arduino.
- (a positive one) Rotary Encoder works great with Arduino if you use interrupts. It can do anything else (like motor control) in parallel just fine. You do not need resistors – use pin pullup mode!
- Arduino 32U4 interrupts shall NOT be used. Instead, use Arduino library YetAnotherPcInt.
- If you decided not to use YetAnotherPcInt and subscribed to some interrupts and bricked 32U4 so it is no longer programmable – you can unbrick it by shorting reset pin to ground while sketch is compiled and release it when it starts loading. You might have to try it a few times to get the timing right. Allegedly, you can shorten it twice and that extend your upload window to 10 seconds, but I was not able to reproduce it. Anyways, use PiInterrupts, not regular interrupts, and you your 32U4 will not brick.
- Buy yourself SSD1306 displays and add one to each of your Arduino project! It will save you tons of debug time! This thing Is awesome! They are is dirt cheap on Aliexpress. Interface is S2I. Adafruit library handles it great. You might think, oh, why would not I buy 16×2 display instead? Well, there are more wires, but that’s not the biggest issue. 16×2 flickers. You need to care which part of it to re-draw. SSD1306 you can erase and redraw and it does not flicker. Perhaps, it double buffers and redraws pretty fast.
- Why there is no microstepping library for Arduino? You would say – wait, there are many! Sure, I used two of them. But they are NOT for Arduino. They are for Arduino Shields. They do NOT use Arduino PWM, they use PWM implemented in the shield. That should make me suspicious. But it did not. I thought – fine, I will write microstepping lib for Arduino myself! And so I did. And it worked. But now I know why nobody have published it before. Because Arduino PWM frequency is 490 Hz. And my poor motor was singing like crazy. But full step did not provide me enough resolution. So I wrote another library that does half step. It does not use PWM.
- “Industrial” microscope comes with no automated API. It has pretty nice graphics UI, but it is all manual. Do they understand what word “Industrial” mean? Oh well. Microscope supports just one keyboard button – “Esc”. Not very helpful. I needed to make it capture a picture after every stage move. So I added to the same 32U4 a code that pretends to be a mouse, move cursor to the right to pop up a menu, then to the left – over the “Take Photo” button. Then click. Mouse lib moves were relative with no repeatability. I tried Arduino library with absolute mouse moves. It worked better, but not all the way. Let me repeat it again: there is NO WAY to put mouse cursor to specified position on a screen of the microscope using 32U4. (I did not try it with other OS like Windows. Maybe, it only true for the OS used to run the microscope?) Anyways, I ended up moving the mouse cursor to the desired position with a physical mouse and only to mouse click with 32U4. It is less cool, but at least I was able to run the whole process and collect the images.
Here are the sources
I do not provide any warranty. Use your own good judgment when writing your code.
Leave a Reply